Skip to content

“Plasma cutting” and “good plasma cutting” are two entirely different things. “Plasma cutting” is almost as simple as not pointing the nozzle at your face and pulling the trigger. But plasma cutting like a pro, now that’s where some key tips and tricks can really help you out.
In this article, we’ll cover the secrets of starting your cuts like a professional. These pointers will help you produce better cuts and increase the lifespan of your consumables. That means time-saving benefits for you and cost-saving benefits for your wallet.
Before You Pull the Trigger
Even before you pick up your torch, you can avoid one of the most common issues that many welders face when using a plasma cutter: choosing the right settings.
To be fair, craftsmen across all trades tend to rely on a lot of guess-and-check. “What size of socket do I need? Oh, I’ll just keep guessing until I find the right one.” How many times have you done that?
The issue with plasma cutting is that — unlike guessing at sockets — choosing incorrectly can cost a lot more than just your time. Often, you might end up with settings that are “good enough” but in reality, your machine was capable of a much cleaner cut.
To find the ideal settings for your cut, you’ll want to reference your plasma cutter’s user manual. Some machines have an auto-set feature that will help simplify this process.
Edge Starting
When you’re first learning how to plasma cut, it can take a toll on your consumables (and consequently on your wallet). Finding ways to increase the longevity of your consumables will let you work more efficiently and cost-effectively.
One of the easiest ways to increase your consumable lifespan is by edge starting whenever possible. Instead of starting your torch on your workpiece, position it so the nozzle is just off the edge of where you want to begin your cut.
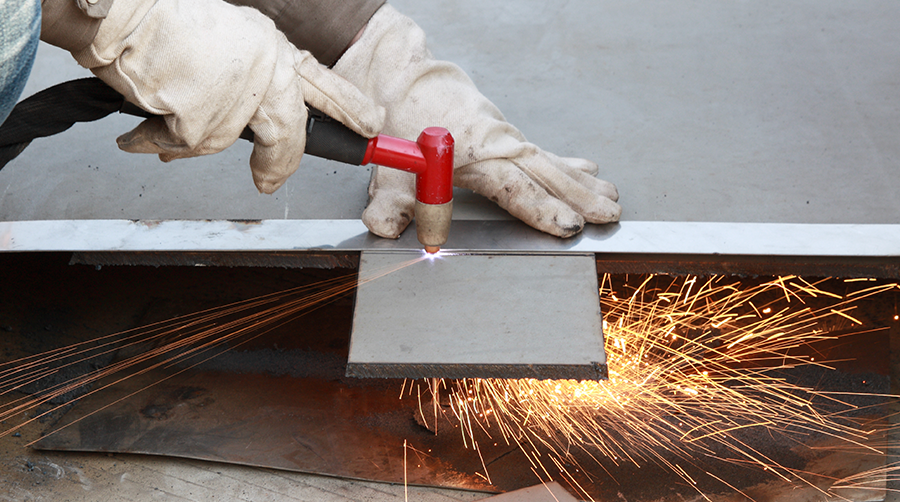
Pull the trigger. At this point, your torch should be cutting on the very edge of your workpiece. Pause here and let your arc completely cut through the material. Once you’ve cut all the way through, you can continue your cut by moving your torch at a steady speed over your workpiece.
If you’re cutting all the way to another edge, slightly angle your torch as you approach the end of your cut so that the arc will exit your workpiece first. This helps ensure you get a nice, clean finish.
Edge starting isn’t always possible for every cut, but doing it when applicable will help extend the life of your consumables.
Through Thick and Thin
The way you pierce through materials should differ depending on thickness. With thinner materials, edge starting should be your first option. However, if that isn’t possible, then you can simply position your torch where you want your arc to begin and pull the trigger. It’s a little rougher on your consumables, but pretty simple to execute.
For thicker material, however, you’ll want to take a different approach. Again, edge starting can often be the best-case scenario. Remember though, you’ll need to pause on the edge until your arc has completely passed through the metal (which will take longer with thicker material).

When edge starting isn’t possible on thicker materials, you’ll generally want to do a rolling pierce. To do this, first hold your torch upright to your cutting material (just like you would do when piercing thinner material). However, before you pull the trigger, turn your torch slightly about 25 degrees. As a helpful tip, some welders like to face their angle in the direction they’ll be cutting.
After you’ve positioned your torch, you’re going to pull the trigger. Once the cut has started, you rotate your torch upright and pause until your arc has cut all the way through the material. Once you’ve pierced your material, you can proceed with the rest of the cut.
Your Machine’s Abilities
For dealing with thicker materials, it’s also important to know your machine’s limitations. Most machines are rated for a recommended cut thickness and a severed cut thickness. The “recommended cut” tells you how thick of material your machine can cleanly cut through. For instance, the Lincoln Tomahawk 625 has a recommended cut of ½ inch.
The “severed cut” limit is basically the maximum thickness that your machine can slice through. At that thickness, the cut might have some ugly edges, but your machine should be able to get through the material. Our example of the Tomahawk 625 has a severed cut of ¾ inch, meaning it’ll cut through material that thick, but you’ll probably need to clean up your edges afterward.
We have a complete guide that breaks down which machines are capable of what thicknesses. This is perfect for when you already know how thick you need to cut and want to know which machines will meet your needs. You can check that guide out for yourself here.