Hard Surfacing (or surface welding) has somehow become a trade secret. It’s an incredibly useful process buried in a mountain of complicated details, surrounded by a circus of welding elite all chanting “you’re doing it wrong.” We’ll no more, friends. We’re giving you a place to start with our basic guide to hard surfacing.
What is hard surfacing? Simply put, it’s literally just welding a reinforced layer to a piece of metal. Generally surface welding is done on metal surfaces that tend to wear down quicker. We’re talking lawn mower blades, front-end loader buckets, snowmobile skags, or Julia Robert’s toothbrush.
Cleaning
First thing you want to do is identify your base metal (your workpiece) so you know at what parameter’s you need to set your welder. If you don’t know what type of metal your workpiece is, we’ve got an awesome post on spark testing to help you out.
Once you’ve identified your base metal, it’s time to clean off any grime, grease, rust, oil or gunk from the surface you’ll be reinforcing. If your workpiece has already been surface welded before, you’ll need to grind that layer off— otherwise, you’re going to have a real cracking problem. If your piece has any cracks or deep grooves, you’ll want to fill those in as well.
The Buttering Layer
Before you place your actual hard surface layer, you’ll want to lay down a buttering layer. Essentially, the buttering layer is a buffer between your base layer and your hard surface layer. The first trick is choosing the right electrode or wire (depending on your process). Different metals require different consumables, but the principle is the same. You want good fusion with less penetration. So if you’d usually use a 6010 electrode on your metal, use a 6013 instead.
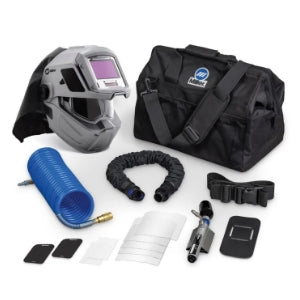
Before you flip that power switch, make sure you’re also working in a well-ventilated space. Often, you’ll have no idea what type of treatment your base metal has received. If you’re not careful, you could be accidently burning galvanized fumes into the air. If you’re welding in a shop, seriously consider getting a ventilated helmet. COPD is a horrible way to go.
Once you’ve got your consumables for your buttering layer, you’ll need to figure out bead placement. If you’re working on an incredibly expensive workpiece, it’s worth it to bring out an engineer and come up with a welding procedure detailing the exact bead placement. However, if you’re working on a small machine in your garage, here are the basics:
 If your workpiece will be coming in contact with softer material, for instance dirt or sand, you’ll want your beads placed perpendicular to how they’ll be worn down.
 If your workpiece is mainly used for harder material such as stone and gravel, you’ll want to place your beads parallel to how they’ll wear.
 If you’ll be using your workpiece for both soft and hard materials, it’s a good idea to do a grid of 45 degree angled lines (like the pattern to the left).
Once you start welding, you’ll want a lot of overlap with your beads. It should be enough that you can only make out the tops of your bead lines. If your piece looks like one giant welding bead, that’s too much overlap. If you can feel distinct valleys between your beads, that’s not enough.
Hard Surface Layer
The hard surface is the final layer done on top of your buttering layer. For your hard surface, you’ll need a special type of electrode or wire that’s engineered for this type of application. Because of their design, these types of consumables are more costly than your normal products so brace for the sticker shock. Here’s a collection of our favorite hard surfacing consumables.
Generally (depending on the bead pattern you’ve chosen), you’ll lay down your hard layer similar to your buttering layer, with the separation between each bead about the same as you did before. It helps to practice on a spare piece of metal with normal consumables before you start welding with the expensive hard surface ones. The main goal is to get a nice, consistent layer of hard surface. Try not to pass over too many times as the thicker your hard surface coat gets, the more likely it is to crack.
Bam, you’re done! New life to that lawn mower blade or loader bucket. Of course, hard surfacing is much more an art than a science, so let us know your tips and tricks in the comments below.


