Skip to content

MIG welding is one of the most user-friendly welding processes for someone looking to get into metal work. Although it’s often described as “a metal hot glue gun,” MIG is still an incredibly deep process that can take a lifetime to master. However, by following the right steps, a beginner can tackle the basics in no time.
Before striking an arc, there’s two things a MIG welder needs to do in preparation: set their machine to the right settings and clean up their weld surfaces. We’ll go into detail about each of these steps.
Finding the Right Settings
Hands down, the most common mistake for welders is choosing the wrong settings. If you’ve got the wrong parameters, no matter how well you perform the rest of the process, your welds are going to look like garbage on a hot day in New Jersey.
The secret to getting the right parameters is to follow the process. Most welding machines will include a settings chart right on the case. Using the chart, you can reference your wire diameter and your material thickness to get your starting voltage and wire speed settings.

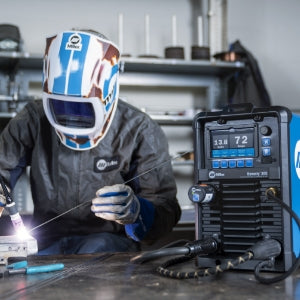
If you’ve got a welding machine with auto-set technology, you can skip the reference chart completely. All you have to do is input the wire diameter and your material thickness, and it does the rest for you! It’s a really nice time saver that helps avoid unnecessary headaches. Some of our favorite auto-set machines include the Millermatic 211 and ESAB Rebel EMP 215ic.


Once you’ve set your parameters to match your reference chart or used an auto-set feature, you might have to make a few small adjustments. Most MIG machines will allow you to change your voltage and your wire feed speed. We’ll go into detail about each of those.
Wire Feed Speed and Voltage
Wire feed speed will increase or decrease how quickly the wire comes out of the tip of your MIG gun. If you’re familiar with other welding processes, this essentially equates to your heat (or amps).
As you might expect, your “voltage” setting dictates how many volts your arc uses. This essentially translates to the maximum distance that your arc can be from your wire to your base metal. If you notice that your arc can become very long with a lot of spatter (flecks of molten metal getting shot as you weld), your voltage is likely too high. On the other hand, if your arc isn’t lasting long enough to build up a weld pool, your voltage is most likely too low.
Keep It Clean

The last preparation step before you start welding is to clean your material. MIG might be a little more forgiving than TIG when it comes to material cleanliness, but contaminants can still easily ruin your beads. The best welders are downright obsessive about the cleanliness of their materials. You’ll want to remove any rust, paint, dirt, grease or oils from your welding pieces with either a grinder and/or a non-woven abrasive material.
Welding Technique
Once you’ve set the proper parameters and cleaned your weld pieces, it’s time to spark an arc. We’d strongly recommend doing several practice welds first. This also allows you to fine-tune your settings. When it comes to your actual weld technique, there’s a few things you’ll want to keep in mind:
Stickout
When MIG welding, you’ll want to hold the tip of your MIG gun so that around 3/8th inch of wire is able to stick out before contacting your base metal. This is known as “stickout.” If you hold the MIG gun too close, you risk welding your wire to the tip of the gun. If you hold it too far away, your shielding gas will have a hard time covering your full weld pool.

Position & Speed
As a beginner, it’s best to start welding in a normal position. Practicing vertical or overhead welds is important, but make sure you’ve got a grasp of the basics first. You can either push your weld pool along or pull it, whichever feels most natural to you. With most welds, you’ll want to hold the MIG gun at a 15 degree angle in the direction you’ll be traveling.
The exact speed and motion you use is somewhat open to your own personal preference. Some welders will weave or oscillate their MIG torch at different speeds. Other welders simply follow a steady, single speed and motion for the full length of their bead. For your first few welds, it’s often easiest to stick with a steady motion and speed. However, we’d recommend you begin experimenting with different motions and speeds when you feel comfortable. Finding a nice rhythm that works best for you is one of the simple, satisfying joys that comes from MIG welding.
Trust the Process
Learning takes time and practice. Even if you know the steps, you’ll need to develop the muscle memory and recognition to tell what a good weld looks and sounds like. If you’re using cheap or subpar welding equipment, this can make the entire experience incredibly frustrating. When you’ve got equipment you can rely on, trusting the process becomes much easier.
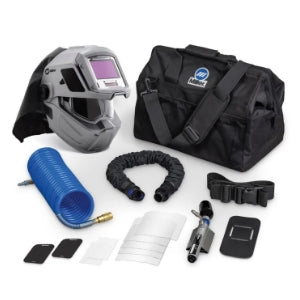
Welding Supplies from IOC offers a number of MIG welders perfect for beginners. These machines are more cost effective for welders just getting started, but don’t sacrifice reliability. Check out our favorite starting MIG machines below: